Today I plan to introduce the basic usage of notifications. First, let's take a look at the introduction on the official website.
Notifications are messages that can be displayed to users outside of an application's regular UI. When you notify the system to issue a notification, it will first be displayed in the form of an icon in the notification area. Users can open the notification drawer to view the details of the notification. Both the notification area and the notification drawer are controlled by the system and can be viewed by the user at any time.
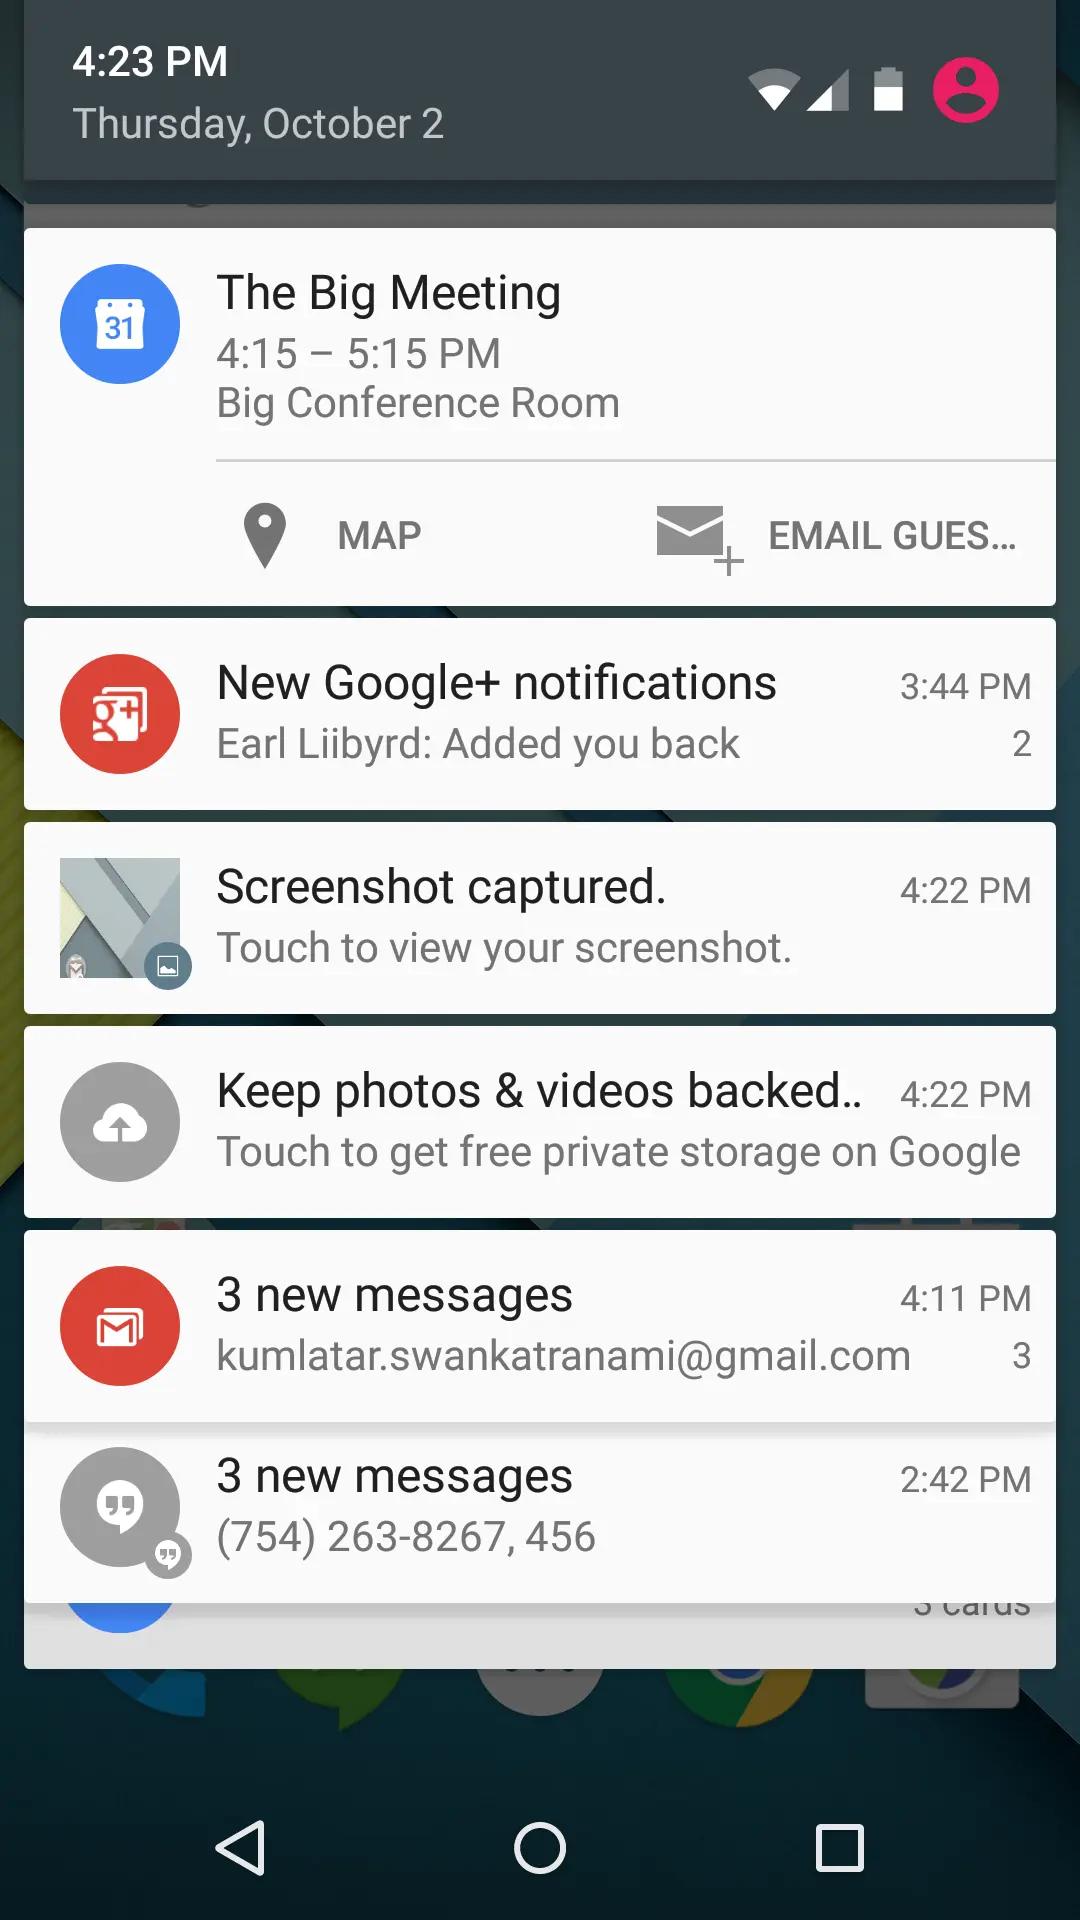
The specific display is as follows:

I believe that after reading the introduction, everyone should understand some use cases for notifications. Nowadays, most applications have push notification functionality, and notifications are used to display them. For example, Jian Shu sends push notifications to you at irregular times. Now let's introduce the specific usage of notifications.
Basic Knowledge#
To create a notification, we need the Notification class. We can specify the UI information and actions for the notification in the NotificationCompat.Builder object, and then call NotificationCompat.Builder.build() to return a Notification object that contains your specific specifications. Then, pass the Notification object to the system through NotificationManager.notify() to let the system handle the subsequent processing for you.
A Notification object must include the following three elements:
- Small icon, set by the setSmallIcon() method
- Title, set by the setContentTitle() method
- Detailed text, set by the setContentText() method
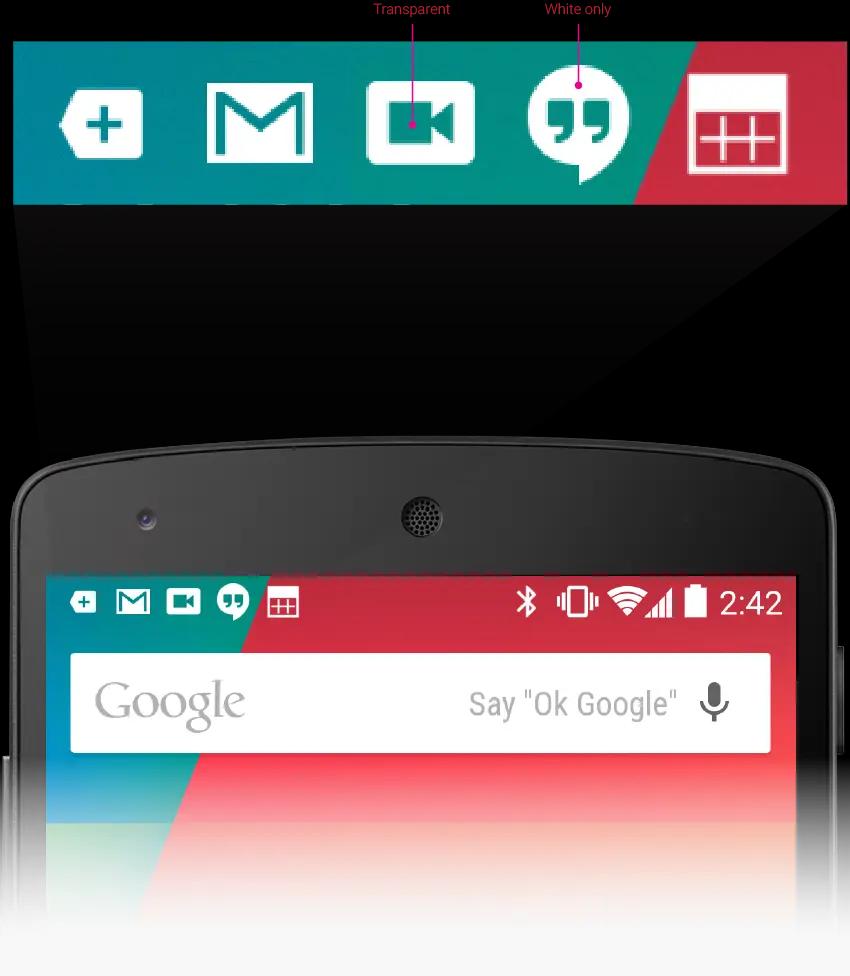
In other words, these three elements are required. Without them, even if a Notification object is created, it cannot be sent. Also, let's explain the small icon. The small icon refers to the small icon in Figure 1 in the notification area, and it is also the small image in the lower right corner of the large image in Figure 2. It is a special image. After Android 5.0, the official requirement is that the notification bar icon of all applications should only be drawn using the alpha layer, and should not include the RGB layer. That is, do not add any additional transparency, gradient colors to the notification icon, and do not use colors to distinguish the notification icon from other applications, such as system applications. The notification icon (i.e. the small icon) of the application should only have a white pattern on a transparent background.
In addition, the specific design can refer to the material design guidelines for notifications, at the address https://material.io/guidelines/patterns/notifications.html. Below are two images to help you understand the UI display corresponding to each parameter,
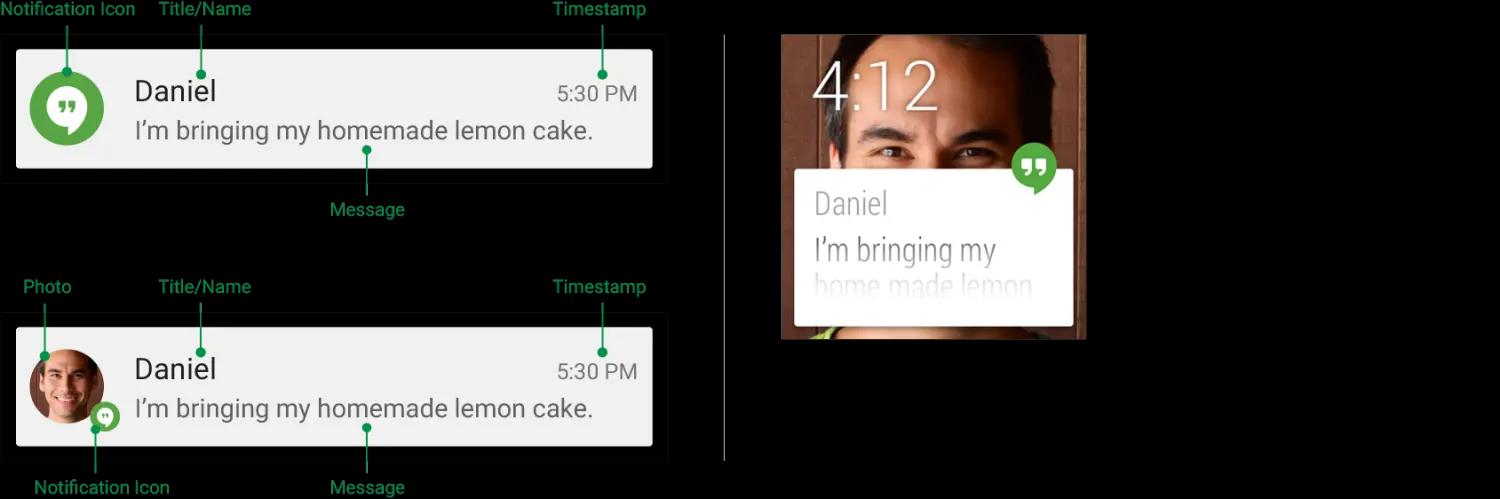
The NotificationIcon in the above image actually refers to the smallIcon, Title refers to ContentTitle, Message refers to ContentText, and there is also a timestamp, etc. All other settings for notifications are optional.
Notification Actions#
After setting up the notification, we need to add an action to the notification to respond to the user's click. Of course, you can also not add this action, so that it hangs in the notification bar and does nothing when clicked, but this is not a good user experience. After the user clicks the notification, it can directly jump to the corresponding activity to perform the next operation. Inside the Notification, the action itself is defined by PendingIntent, which contains the Intent to start the Activity in the application.
Creating a Notification#
We can create a notification by following these steps:
- First, create a NotificationCompat.Builder, and use this builder to set the content needed for the notification to generate a Notification.
NotificationCompat.Builder builder = new NotificationCompat.Builder(context);
Notification notification = builder
.setContentTitle("This is the notification title")
.setContentText("This is the notification content")
.setSmallIcon(R.mipmap.ic_launcher)
.setLargeIcon(BitmapFactory.decodeResource(
  getResources(), R.mipmap.ic_launcher))
.build();
-
Set the priority
Notifications also have priorities. We can set the priority of the notification by passing it to setPriority(). Currently, there are five levels of priority for notifications, ranging from PRIORITY_MIN (-2) to PRIORITY_MAX (2); if not set, the priority defaults to PRIORITY_DEFAULT (0). The higher the priority, the higher the notification will be displayed in the notification bar. -
Set an action after clicking
As mentioned earlier, we can set an action after clicking the notification through PendingIntent. For example, jump to an activity.
Intent resultIntent = new Intent(this, ResultActivity.class);
PendingIntent resultPendingIntent = PendingIntent.getActivity(
            this, 0, resultIntent, PendingIntent.FLAG_UPDATE_CURRENT);
mBuilder.setContentIntent(resultPendingIntent);
In this way, users can click the notification to jump to the ResultActivity page.
- Send the notification using NotificationManager
NotificationManager mNotificationManager =
    (NotificationManager) getSystemService(Context.NOTIFICATION_SERVICE);
// mId allows you to update the notification later on.
mNotificationManager.notify(mId, mBuilder.build());
- Update the notification
When we need to update the content of the notification, we can update it based on the id of the notification set above. Just update the notification with the same id. The specific operation is actually similar to creating a notification. The official sample code is as follows:
mNotificationManager =
        (NotificationManager) getSystemService(Context.NOTIFICATION_SERVICE);
// Sets an ID for the notification, so it can be updated
int notifyID = 1;
mNotifyBuilder = new NotificationCompat.Builder(this)
    .setContentTitle("New Message")
    .setContentText("You've received new messages.")
    .setSmallIcon(R.drawable.ic_notify_status)
numMessages = 0;
// Start of a loop that processes data and then notifies the user
...
    mNotifyBuilder.setContentText(currentText)
        .setNumber(++numMessages);
    // Because the ID remains unchanged, the existing notification is
    // updated.
    mNotificationManager.notify(
            notifyID,
            mNotifyBuilder.build());
- Delete or cancel the notification
When we need to manually cancel the notification, we can call the cancel() method of NotificationManager. There are several ways to delete it:
- The user individually or using "Clear All" clears the notification (if the notification can be cleared).
- The user clicks the notification and you called setAutoCancel() when creating the notification.
- Called cancel() for a specific notification ID. This method will also delete the current notification.
- Called cancelAll() to delete all previously sent notifications.
Alright, at this point, we can already create basic notifications. I will write about some other ways to use notifications later.